

Process post about the Mini Print project.
About
The annual Mini Print is an exhibition by UWE MA Multi-Disciplinary Printmaking students and staff.
Format: 20 x 25 cm paper, and a maximum image size 10 x 8cm Edition: 60
Arnolini Bookshop, Bristol
Preview: Thursday 3 December, 2015 (5.00 - 7.30pm)
In return for participation, each artist receives a full set of 30 prints. 5 of the remaining prints from each edition are archived in the CFPR and UWE collections, and the rest are available to buy.
For more information see: Website
Concept
The subject and medium for each print is dictated by the individual artist
For my print I plan to produce something which relates to the theme of my final project, but also acts as a testing ground for the direction of my work, particularly in terms of execution and style.
Conceptually I am exploring the relationship between digital and physical objects using the theme of games and play - specifically pinball.
This project will be a chance to execute ideas of sketching digitally in 3D software and how that object translates to print (or physically in some way)
Examples: Visual Thought & Particle Memory
I want to expand and refine this. Part of that is to become better at using 3D software. I've decided to focus on using Blender as it is open source and I am finding it easier to work with than Rhino.
I want to expand and refine this. Part of that is to become better at using 3D software. I've decided to focus on using Blender as it is open source and I am finding it easier to work with than Rhino.
Experimentation
(starting 17 September 2015)
I'm going to start producing a series of test pieces to explore using 3D software as a sketchbook and outputting up to the stage of ready to print files.
I will list these below, showing mockups of frame artwork with notes.
I'm going to start producing a series of test pieces to explore using 3D software as a sketchbook and outputting up to the stage of ready to print files.
I will list these below, showing mockups of frame artwork with notes.

17/9/15
Notes: Practice creating basic 3D geometry in Blender, testing workflow for exporting the image and processing in Photoshop with diffusion dither for screenprint.
Trying out a layer of colour but not happy with the murkiness - need to retain (or try to recreate) the vivid RGB colours - few ideas to try (change key colour, and export the colour layers flat).
Technical note: because I am creating these for the intention of screenprinting I want to find a workflow I can generate the separate layers of colour almost directly from Blender.
Workflow:
Key Layer Material white / Blender render image / Photoshop Diffusion Dither
Colour Layer Material coloured default / Blender render image / Photoshop Diffusion Dither


002
18/9/15
Improving the vividness of the representation of colour. 2 versions trying out the two ideas I had from 001 - to export the colour layers flat (with no shading) and change the key colour from black to (in this case) purple. Much happier with these results.
Workflow:
Key Layer Material white + increased intensity / Blender render image / Photoshop Diffusion Dither
Colour Layer Material coloured shadeless / Blender render image / Photoshop Flat artwork as exported

18/9/15
Ok I need to work with more complex shapes, not just the out of the box ones in Blender. Start by drawing a pinball flipper using similar methods to my previous examples.
Importing Illustrator files as .svg. I'm comfortable drawing in Illustrator so think this could be the best way for me. I had some problems with the export settings from Illustrator to get .svg files into blender this forum post solved it.
This tutorial was helpful for working out some more things to know in Blender when importing .svg from Illustrator. (Convert to mesh from curve)
Workflow:
Shape drawn in Illustrator saved as svg / Blender import + scale + convert to mesh + extrude etc


18/9/15
Curbing my curiosity a bit with this experiment. Basically wondering about going totally flat with the style instead of the grain, which is making things a bit murky looking. There's options to explore here. It may well be about finding a balance. Will schedule some time to screenprint a test.
One with background could be a digital print - I don't have to constrain myself to screenprinting. Second just by removing the background maybe helps. Third is a mix with no background and grain (with key colour grey). Liking where it's going.
The concept and qualities I originally wanted to achieve was to create this grainy vision (in a way recreating a thought from a visual/dreamy memory). The diffusion dither lends itself well to screenprinting too but I need to test it won't be too messy looking - I want a refined print.
Getting more familiar with Blender already, so far this has been a good exercise. I often find myself guided by software, so this was a good test of having an idea and trying to execute is as I envisioned.

005
19/9/15
Attempting to execute an idea of using a pinball cabinet to the size of the mini print, rotated at an orthographic angle instead of being straight. After playing around a bit I decide that wasn't working, as it looked like it was floating, hence why adding the legs.
This is really an exercise in mapping images onto the 3D object - UV mapping.
The designs are based on an old pinball machine that I am currently restoring. I'm going to need to recreate some of the graphics on it so I figure it would be good practice to recreate it in 3D too. If I go forward with this I'll add the playfield and maybe the backbox too.
It'll be even better screenprinted, but will need more work to separate and retain a flat shadowed look.
This tutorial and This one were helpful.
Workflow:
Blender UV mapping - export UV Map and place graphics in Photoshop Import mapped art into place

20/9/15
I was curious about adding the flipper I had previously drawn to the blank playfield of the cabinet I drew in the last experiment, obviously I didn't want to draw the flipper again, but I also knew there would be a way to work with external files -linking (retains a link to the original file so if any updates are made these will come through) or appending (just takes a copy basically).
This tutorial explains appending and linking from other files.
I should start making a bank of pinball parts which I can just link into the files I make. Keeping each part separate will be good for project management.
I've added the bumpers for the Expressway pinball machine, along with some rough placements for some other parts.
Note the importance of file management (if files move this destroys links) and also naming layers - I haven't been doing this so far - many layers name 'cube' isn't helpful when linking objects.
http://www.cgtextures.com/ for textures.
Workflow:
Blender Link - import Object (note not the mesh) from another Blender file (.blend)
Print Test
At this stage I was happy with the route of the artwork so I could go ahead and draw the remaining parts on the Expressway. However I was still in between printing a close up of a single pinball part or the full pinball machine in tiny scale. I needed to make a decision to use the diffusion dither method I had been planning on doing to create a speckled/misty/grainy vision - so I went ahead and did a test screenprint.

Note the moire effect from the diffusion dither on the screen - because it's a random effect, unlike the process seperations there's no defined angle (I don't think there is anyway). At this size it's not working for me. I was pretty set that the diffusion dither was indeed too murky and wasn't going to work, so this helped make a decision to use process separations (CMYK) with an ellipse halftone. Also helped me make up my mind to print the tiny little highly detailed pinball machine rather than a close up of a part which kinda makes no sense.
Final Art
No more time for test prints, right to the point of printing the edition of 60 four colour prints.


 There was a little bit of dilemma about printing the process black layer - the black dirtied up the pinball cabinet artwork, which is a bit disappointing, but on the other hand it has really made the playfield parts pop out and become defined and detailed even at a tiny scale.
 I'm glad I went with the black after a lot of suggestions by others in the printroom to leave it off. For future it does make me realise how I need to do a bit of tweaking to colours before hand to avoid a murky build up of colour, or use spot colour. I could have used stop-out on specific parts along with a different black which is not as powerful as process.
For more information, to see other prints or to buy my print see the Mini Print Website.
I was curious about adding the flipper I had previously drawn to the blank playfield of the cabinet I drew in the last experiment, obviously I didn't want to draw the flipper again, but I also knew there would be a way to work with external files -linking (retains a link to the original file so if any updates are made these will come through) or appending (just takes a copy basically).
This tutorial explains appending and linking from other files.
I should start making a bank of pinball parts which I can just link into the files I make. Keeping each part separate will be good for project management.
I've added the bumpers for the Expressway pinball machine, along with some rough placements for some other parts.
Note the importance of file management (if files move this destroys links) and also naming layers - I haven't been doing this so far - many layers name 'cube' isn't helpful when linking objects.
http://www.cgtextures.com/ for textures.
Workflow:
Blender Link - import Object (note not the mesh) from another Blender file (.blend)
Print Test
At this stage I was happy with the route of the artwork so I could go ahead and draw the remaining parts on the Expressway. However I was still in between printing a close up of a single pinball part or the full pinball machine in tiny scale. I needed to make a decision to use the diffusion dither method I had been planning on doing to create a speckled/misty/grainy vision - so I went ahead and did a test screenprint.

Note the moire effect from the diffusion dither on the screen - because it's a random effect, unlike the process seperations there's no defined angle (I don't think there is anyway). At this size it's not working for me. I was pretty set that the diffusion dither was indeed too murky and wasn't going to work, so this helped make a decision to use process separations (CMYK) with an ellipse halftone. Also helped me make up my mind to print the tiny little highly detailed pinball machine rather than a close up of a part which kinda makes no sense.
Final Art
No more time for test prints, right to the point of printing the edition of 60 four colour prints.


 |
| Signed and numbered |
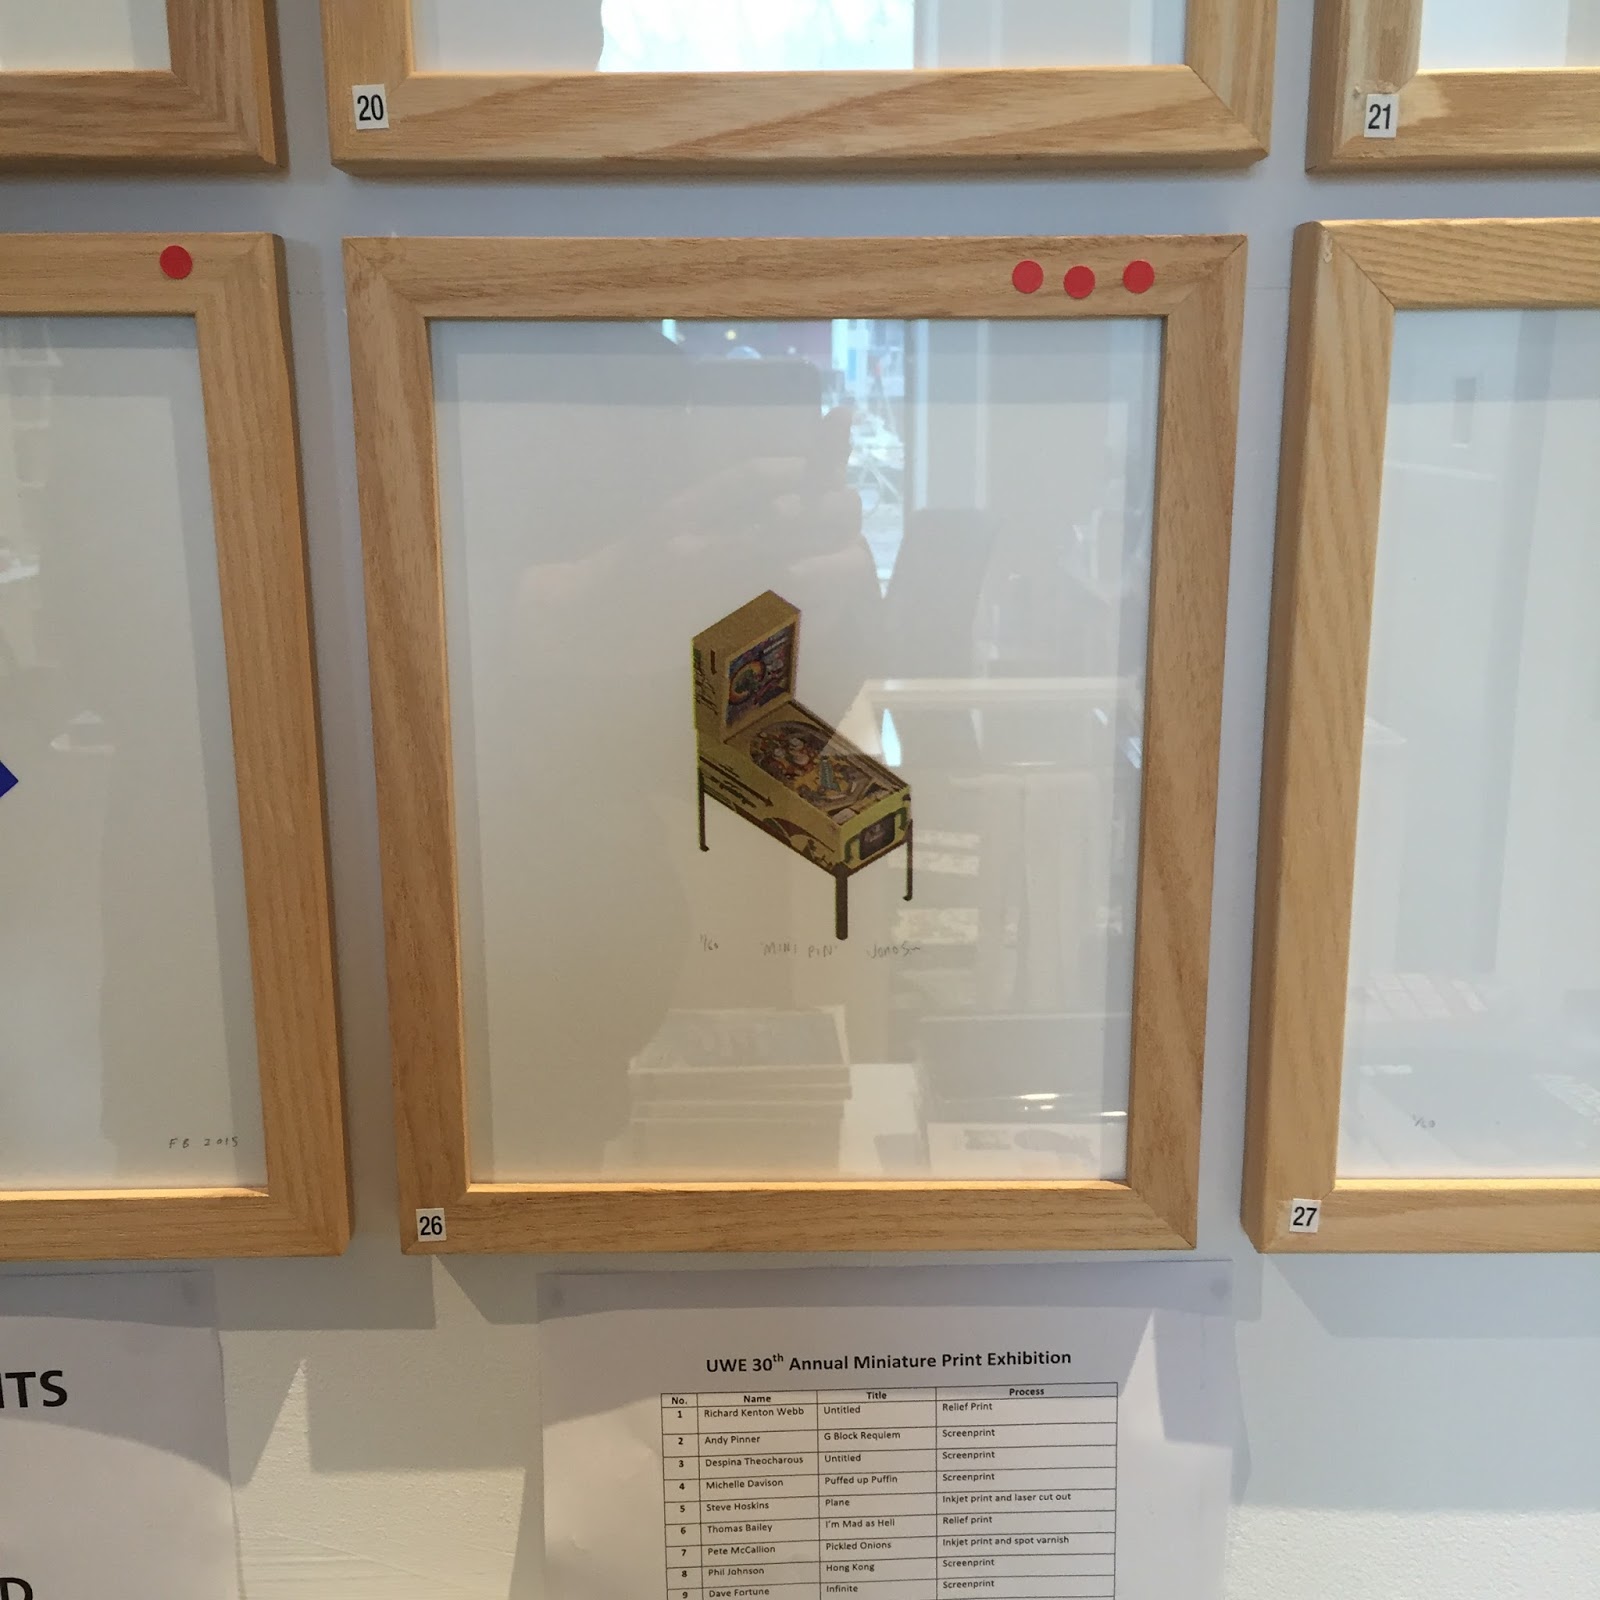 |
| Framed print during the exhibition at Arnolfini |
 |
| Unframed print |
No comments:
Post a Comment