The backbox was something I had always planned to review at the time of completing the playfield. There was a question if I was going to have one or not, due to tight timescales.
Now that work on playfield assembly is almost completed it is the time to get the backbox done. I really think it is a necessary component, but my design is very simply a lightbox style backbox. At this point it will have no interactivity with the game only as a sign like panel.
I'm doing this alongside some other little bits and pieces that I'm still finishing up on the playfield
Making the Lightbox frame
 |
| The backbox is 600x600mm, so I knock up the outter frame with some timber the depth I require |
 |
| It's simply glued and pinned together, held roughly in place with ratchet straps. It doesn't really need to be perfect. |
 |
| Giving an idea for my more slimline approach, theres no electronics or mechanisms to be housed in the backbox so it can be a little smaller. I had already designed a flat panel at the top of the cabinet for this size. |
 |
| It totally transforms the feel of the machine, realise how important the backbox is for the pinball aesthetic |
Artwork
 |
| The frame is sprayed to match the cabinet, with a handcut stencil this time with simple graphics |
 |
| I'm using 'L' shaped trim to hide the fixing of the perspex, deciding which colour to go for. Yellow is too weak! |
 |
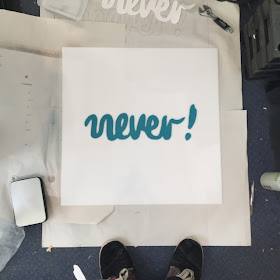
| Perspex supplied next day. What a world we live in! Spray painted with a handcut logo. Saving budget and time. |
Assembly
 |
| The perspex is set in place as the trim is glued on. Nothing too difficult, keeping it simple. |
 |
| And check it out! Ready to mount in place. |
 |
| A bog standard 12v LED strip is attached behind the perspex to glow |
 |
| Ok a late night of working, this is looking excellent! Notice the cabinet protector/frame made in the same way |
Tomorrow the pinball machine gets transported to the degree show space!


No comments:
Post a Comment